Sabtu, 07 Maret 2020

Quick and Easy French Bread


I have never been a good bread baker, although I have always been a great lover of bread.  My ex husband made great bread.  He used to make the kitchen table dance across the kitchen floor when he was kneading it and the results were fabulous.


My mother made great bread.  I can remember coming home from school and smelling it baking from outside the house.  I knew we were in for a real treat even before I went inside!  Does anything on earth taste as good as a slice of fresh bread, still warm from the oven, spread with cold butter???  I think not!


What if I told you that you could bake a loaf of French Bread in less than an hour with only 5 ingredients, including the salt?  Would you believe me?


I have to say I was pretty sceptical myself.  I discovered this recipe on My Mundane and Miraculous Life for an easy peasy French Bread, that made this claim and today I aimed to see if it could actually be done.  I had my doubts.


I make pretty good door stops, but bread  . . .  meh.  French Bread?  Uh-huh . . .  yeh sure.


I have to say I was happily proven wrong . . .  this recipe produced a delicious loaf of bread in less than an hour.  Seriously.  And I can't find anything wrong with it.


It has a lovely dark crust . . . and a beautifully light texture.  It might not be quite as chewy as an actual loaf of French bread but why quibble . . .


And it was done in less than an hour.  Seriously!  It was!  And I didn't mess it up either.


I didn't put quite as much salt into it as the recipe called for.  I only added about 1/2 tsp, if that.  We are trying to cut back on our salt in this house.


It does use rather a lot of yeast, 1 TBS, but then again that was another secret to my ex husband's bread also. He always used more yeast than the recipe asked for.


I just used normal yeast. Not quick yeast or bread machine yeast.  I am tempted to try it again one day with quick yeast and see what the results are.


Todd was really pleased that I had made it because, one  . . .  it tasted so good and two  . . .  he forgot to pick up a loaf of bread while he was out like I had asked him to.


We both enjoyed a slice, warm from the oven and spread with some cold butter  . . .  and I confess . . .  sweet strawberry jam. I used Bonne Maman Intense, which uses less sugar than regular jams.


Oh boy but this was some good. So good that I know what I am going to have for my supper tonight  . . . . yep, more bread and jam!

Quick and Easy French Bread

Quick and Easy French Bread

Yield: 1 loaf
Author:
Quick, easy and incredibly tasty. If I can make this anyone can!

ingredients:

  • 360ml warm water (1 1/2 cups)
  • 1 TBS honey
  • 1 1/2 tsp salt
  • 1 TBS dry yeast
  • 350g to 450g of strong bread flour (3 1/2 to 4 1/2 cups)

instructions:

How to cook Quick and Easy French Bread

  1. Place the water, honey and yeast in a bowl. Let stand for 5 to 10 minutes until it turns frothy and bubbles.
  2. Stir it down then add half the flour and the salt. Stir together well, and then start adding the remaining flour, kneading it in until you have a dough that is not sticky and smooth.
  3. Shape into a loaf and place onto a baking paper lined baking sheet. Cover with a towel and leave in a warm place to rise for 20 minutes.
  4. Preheat the oven to 200*C/400*F/gas mark 6.
  5. Cut slashes in top of the loaf and then bake it in the preheated oven for 20 to 25 minutes, until golden brown and the loaf sounds hollow when tapped on the bottom.

Did you make this recipe?
Tag @marierayner5530 on instagram and hashtag it #EnglishKitchen
Created using The Recipes Generator


Don't take my word for how good this is.  Bake some for yourself.  I think you will be pleasantly surprised!


Black Sesame Paste Recipe 自制黑芝麻酱


My absolute favourite, very tasty and healthy version of homemade ''black sesame paste'' and so easy to make at home. They were however perfect for glutinous rice cake roll, and this recipe contain no oil, no butter, no lard, and using less sugar than many other recipes and grocerious shop. now, create your own black sesame paste with 5 ingrediens and make your version much healthier and

Jumat, 06 Maret 2020

Small Batch Cherry Cheesecake


My mother, God bless her, loved cheesecake.  It was one of her favourite desserts. She was only the size of a bird, so tiny that a good breeze could have easily blown her over, but she did like to eat.  I don't know what her secret was to keeping her slim figure.  I remember her asking me about seven or 8  years back did I have a good cheesecake recipe.  I did and so I shared it with her.  I don't know if she ever made it or not. I like to think that she did, and that she enjoyed it.


Of course with her lung cancer operation and all of the complications she had afterwards, her days of cooking were pretty much over, although by all counts she did have a fairly healthy appetite right up until she passed.  Her tastes had changed however and the things she liked to eat before, she no longer enjoyed.  Funny how that goes.  I suppose it was the dementia.


Cheesecake is not something I make really often.  With there only being two of us, a full-sized cheesecake just is not practical anymore.  I will sometimes buy two slices in the shops, but they never live up to their promise.  That's all I will say about that.


I once bought a frozen Cheesecake Factory one at Costco and that was very good. It was already cut into slices that you could just take out and eat as and when you wanted them.  But it was huge and cheesecake is something we only want once in a very blue moon, so again, highly impractical as I ended up giving  most of it away.  You can't keep these things in the freezer forever.


This quick, easy and delicious baked cheesecake recipe I am sharing with you today ends all of those problems. It is the perfect size for the smaller family!


You bake it in a 9-inch  X 5-inch loaf tin. It cuts perfectly into 6 smallish wedges.  I say smallish, but really they are all any one person really needs to be eating of such a rich dessert.


A delicious swirl of tart dark cherry preserves is baked into the cheesecake . . .  I used an Italian brand.  (Crosta & Mollica)  It has lovely big bits of cherry in it, and I don't find it to be overly sweet.


If you don't like cherries, you could use peach jam, or blueberry jam  . . .  strawberry, raspberry  . . .  any kind of jam you want or desire.


I think you could even use lemon curd if you wanted to . . .  now THAT would be extremely dangerous for me.  Todd might not even get a look in, I am that greedy when it comes to lemon. Sad but true.


It works out fine however because he isn't really fond of lemon anything so he doesn't really mind if I snuffle up all the lemon goodies.


Anyways, back to this dessert.  Its gorgous.  Its simple to make. It is quick to make.


And it is just the right size for us.  If I had some sour cream I would have topped it with some and it would have been even better.


If you are a smaller family looking for a tasty dessert, or even if you are a normal sized family wanting something that isn't going to be hanging around for days, I hazard to guess that this dessert would be perfect for you.


Yield: 6 smallish servings
Author:

Small Batch Cherry Cheesecake

Small Batch Cherry Cheesecake

All of the lush deliciousness of a full sized version, but with less temptation to resist.

ingredients:

For the crust:
  • 160g digestive biscuit crumbs (fine) (1 cup graham cracker crumbs)
  • 60g butter, melted (1/4 cup)
For the filling:
  • 16 ounces (1 pound) FULL fat cream cheese
  • 95g granulated sugar (1/2 cup)
  • 1 large free range egg, beaten lightly
  • 1 tsp vanilla
  • 9 tsp good quality dark cherry preserves

instructions:

How to cook Small Batch Cherry Cheesecake

  1. Preheat the oven to 180*C/350*F/ gas  mark 4.  Butter a 9 by 5 inch loaf tin and line with parchment paper, leaving extra on the sides to lift it out.
  2. Mix together the crumbs and butter.  Press into the bottom of the loaf tin evenly.
  3. Whisk together the cream cheese, egg, vanilla an sugar until smooth.  Pour into the loaf tin on top of the crumbs.  Add the cherry preserves in spoonfuls on top of the batter and then using a skewer, carefully swirl it.
  4. Bake in the preheated oven for 35 to 40 minutes. The centre will be almost set, but still have a slight wiggle.  The top should be firm.  Cool for an hour in the pan then lift out and chill in the refrigerator for at least 4 hour or overnight.
  5. Cuts into 6 small wedges.

Did you make this recipe?
Tag @marierayner5530 on instagram and hashtag it #EnglishKitchen
Created using The Recipes Generator


We are supposed to have a nice weekend weatherwise this weekend.  Here's hoping!  Our back garden s squelching and we could use a few dry and sunny days to dry it out so that we can mow!  Happy weekend everyone! 


Roasted Soy Bean Powder (Kinako) 自制黄豆粉


Kinako is a powder made by finely grinding roasted soya beans and granulated sugar. Commonly used as coating for traditional desserts and sweets, like glutinous rice cake rolls, (mochi) or any baked goods. it can easily be incorporated into a smoothie or shake to increase its nutritional value also adds a natural nutty goodness to your drink of choice and is a great alternative to peanut

Spring Lamb Pan Dumplings – Messing Up, So You Don’t Have To

I never intentionally make mistakes in these videos just so I can show you how, or why, something might go wrong, but maybe I should. Nothing helps a student remember a lesson better than a royal screw-up, especially when that student is in his fifties, and is supposed to ... to read the rest of Chef John's article about these Spring Lamb Pan Dumplings, please follow this link to become a member.)

Follow this link to get a complete, printable written recipe for these Spring Lamb Pan Dumplings!

And, as always, enjoy! 

If you want more information about why the blog format has changed, and why we're now offering complete written recipes, please read all about that here. 

Basic Doughnut Recipe (Sugar Donuts) 古早味甜甜圈


This soft and fluffy homemade doughnuts recipe is very versatile, you can make many different doughnuts of your choice with this basic doughnut recipe. In this blog post, I'm sharing the simplest version... Old-fashioned Sugar Doughnuts, my family's all times favourite ;) 


Making doughnuts is quicker than baking bread, especially with the help of a bread maker. I'm using Song Cho bread maker #dough function to knead the dough, it's so easy and fuss-free. 


Song Cho Bread Maker SC-BK06A

Features:


  • * Sleek body design, large LED display
  • * 14 functions (basic, french, whole wheat, sweet, gluten free, sandwich, cake, bake, rise, rise dough, dough, jam, yoghurt and home made)
  • * 13-hour programmable timer
  • * Ceramic-coated bread barrel for easy cleaning
  • * 10 minutes' power cut-off memory function
  • * Bread weight: 680g to 900g
  • * Bread barrel: 19L x 14W x 17H cm
  • * Techincal Specs: Rated voltage 220/240V~50Hz, Rated power 550W


古早味甜甜圈,传统不退流行的口味。简单无需花俏装饰,大小朋友都喜爱,尤其是现炸的甜甜圈,外酥内松软,真让人无法抗拒。。


Ingredients: 
材料

(A) 

130g Milk 牛奶 130克

20g Castor Sugar 细砂糖 20克

200g Bread Flour 高筋面粉 200克

1 tsp Yeast 酵母 1小匙


(B)

15g Milk 牛奶 15克

20g Egg 蛋液 20克

20g Castor Sugar 细砂糖 20克

1/2 tsp Salt 盐 1/2 小匙

10g Milk Powder 奶粉 10克

30g Butter 牛油 30克

50g Bread Flour 高筋面粉 50克


~~~~~~~~~~~~~~~~~~~

Some Castor Sugar 细砂糖 适量


If you are sharing this recipe/ blog content, kindly attach the link to this blog instead of screen capture/ copy & paste/ use in your blog. No parts of the content of this blog may be reproduced without prior written permission. All rights reserved. Thank you. 

如果您要分享此食谱/内容,请联系这个部落格的相关链接。敬请不要复制或改篇为自己的食谱。谢谢!


Method: 步骤

1. Take out bread barrel from Song Cho Bread Maker. Install the stirring rod. Add Milk > Castor Sugar >  Flour > Yeast into bread barrel. 
将牛奶》细砂糖》面粉》酵母跟次序放入松厨面包机。


2. Return bread barrel into Song Cho bread maker, press bread barrel down, turn it by clockwise and make sure it is installed firmly. Select <#11 DOUGH > , press < START >. 
安装好后按键选择 《#11 DOUGH》,按 《START》。


Note: Need not complete the default 30 minutes kneading time.
Stop kneading when the dough is smooth, as shown in the picture.


3. Stop the machine when the dough is smooth. Let it proof for 1 hour or double in size.
面团搅拌均匀即可,无需搅拌30分钟。发酵1个小时或双倍大。


4. Add in (B), repeat step 2.
加入材料(B),重复步骤 2。


5. When the dough is ready, transfer the dough onto table top. Roll out the dough, let it rest for 5 minutes.
取出面团,擀平后静置5分钟。


6. Cut out the dough using 2 round cookie cutters, rest the dough for 15 minutes.
造型后静置15分钟。


7. Heat oil to 170'C, deep fry the doughnuts till golden brown, coat with sugar and serve.
炸至上色,沾上细砂糖即可。若喜欢我的食谱,可以LIKE和追随我的面书专页,不要错过最新食谱发布。
If you like my recipe, click here, LIKE & follow Miki's Food Archives Facebook page or follow us on Instagram: mfa_dingoozatfood  to receive more recipe updates. Don't forget to change the setting to 'SEE FIRST' if you wish to see my post on your Facebook news feed. 

Enjoy!

Kamis, 05 Maret 2020

Jalapeno & Cheese Potato Bake


One thing I will freely admit and that is that the potato is my favourite vegetable.  I could live without bread if I had to, and steak, but I don't think I would be happy going for very long without a potato.  Its just not possible.


I love them in any way shape or form.  I do have my favourite ways of course, but generally speaking if potatoes are involved I am all in.


I cannot imagine anyone not loving potatoes or even liking them, although I do know it happens. My oldest daughter for instance.  She says she doesn't like potatoes.


She does however like potato chips, french fries, cheesy potato skins, hashbrowns . . . potato sticks.  You get the picture.  She only likes "BAD" potatoes or potatoes infused with fat.  She makes me laugh.  I can't say that I blame her.  I am awfully fond of those things also!


I found a recipe in a cookbook of mine put out by the people at Cooking Light.  Fresh Food, Fast Weeknight Meals.  It was for a potato side dish.  It sounded awfully good.


Unfortunately half the stuff required was not really available here in the UK, or I didn't know what it was.  So I did what any good cook would do.  I adapted it to what I could find, which with this recipe meant that it was pretty much a brand new recipe.


Oh well, I guess you can say it was inspired by them.


I also made it to serve only 3 people, or two hungry ones.


Their recipe called for prechopped pepper and onion mix.  I didn't have any of those, but I did have onions and peppers. So I chopped my own.  It also called for refrigerated sliced potatoes.  I have never seen those.  I have no idea if they are already cooked or what????


I used what I had, which was raw potato, that I peeled and thinly sliced.  It also called for fat reduced jalapeno cheddar.  We don't have that either. 


Instead  I added a chopped jalapeno pepper to the onion/pepper mix and sauteed them lightly,  and  I used a strong cheddar.  Because I was using raw potatoes, I added a bit of vegetable stock. Just to make sure that the potatoes cooked.


It went together very easily and quickly. It did take a bit longer than their suggested bake time.  So I strongly suspect that their potatoes were at least demi cooked.


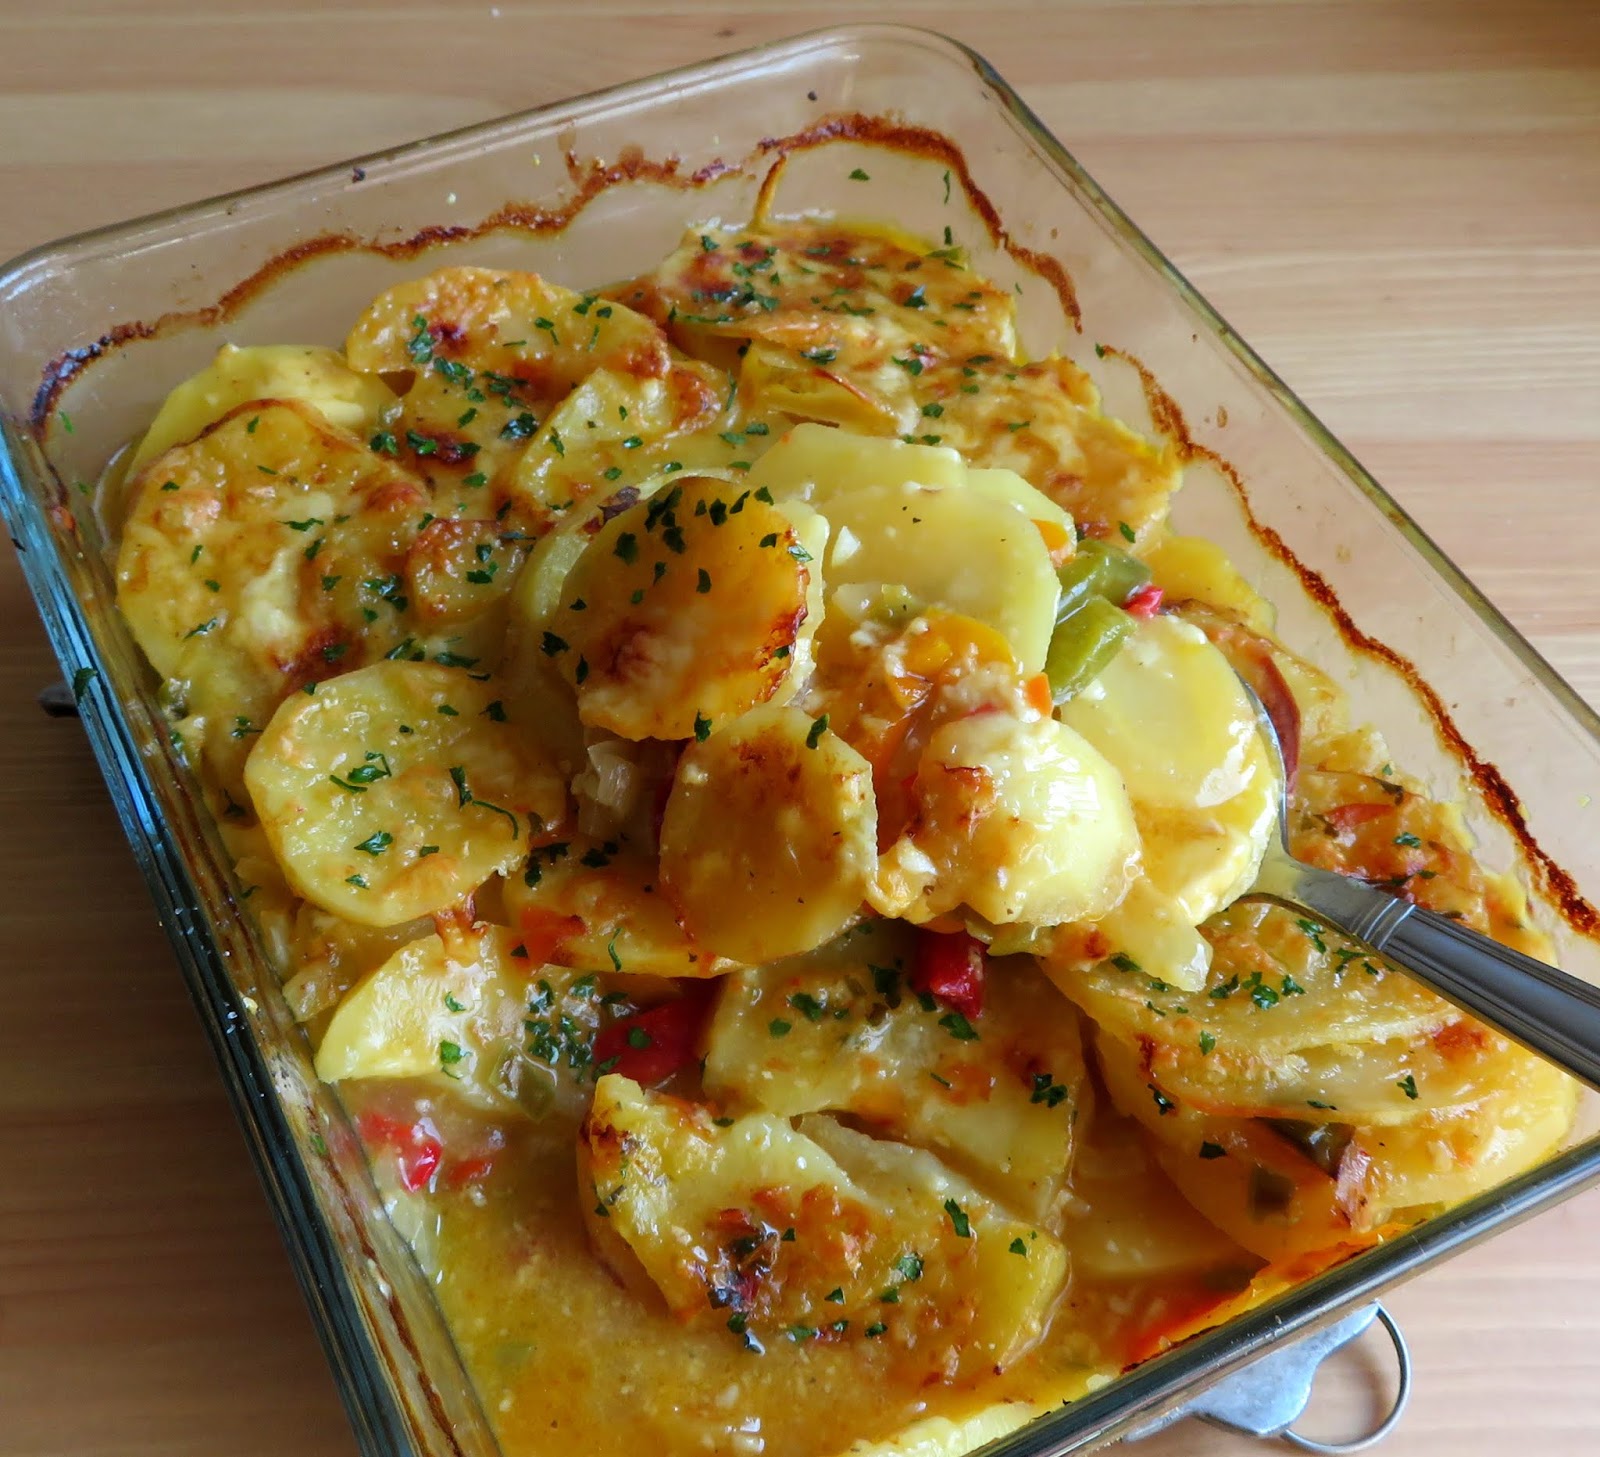
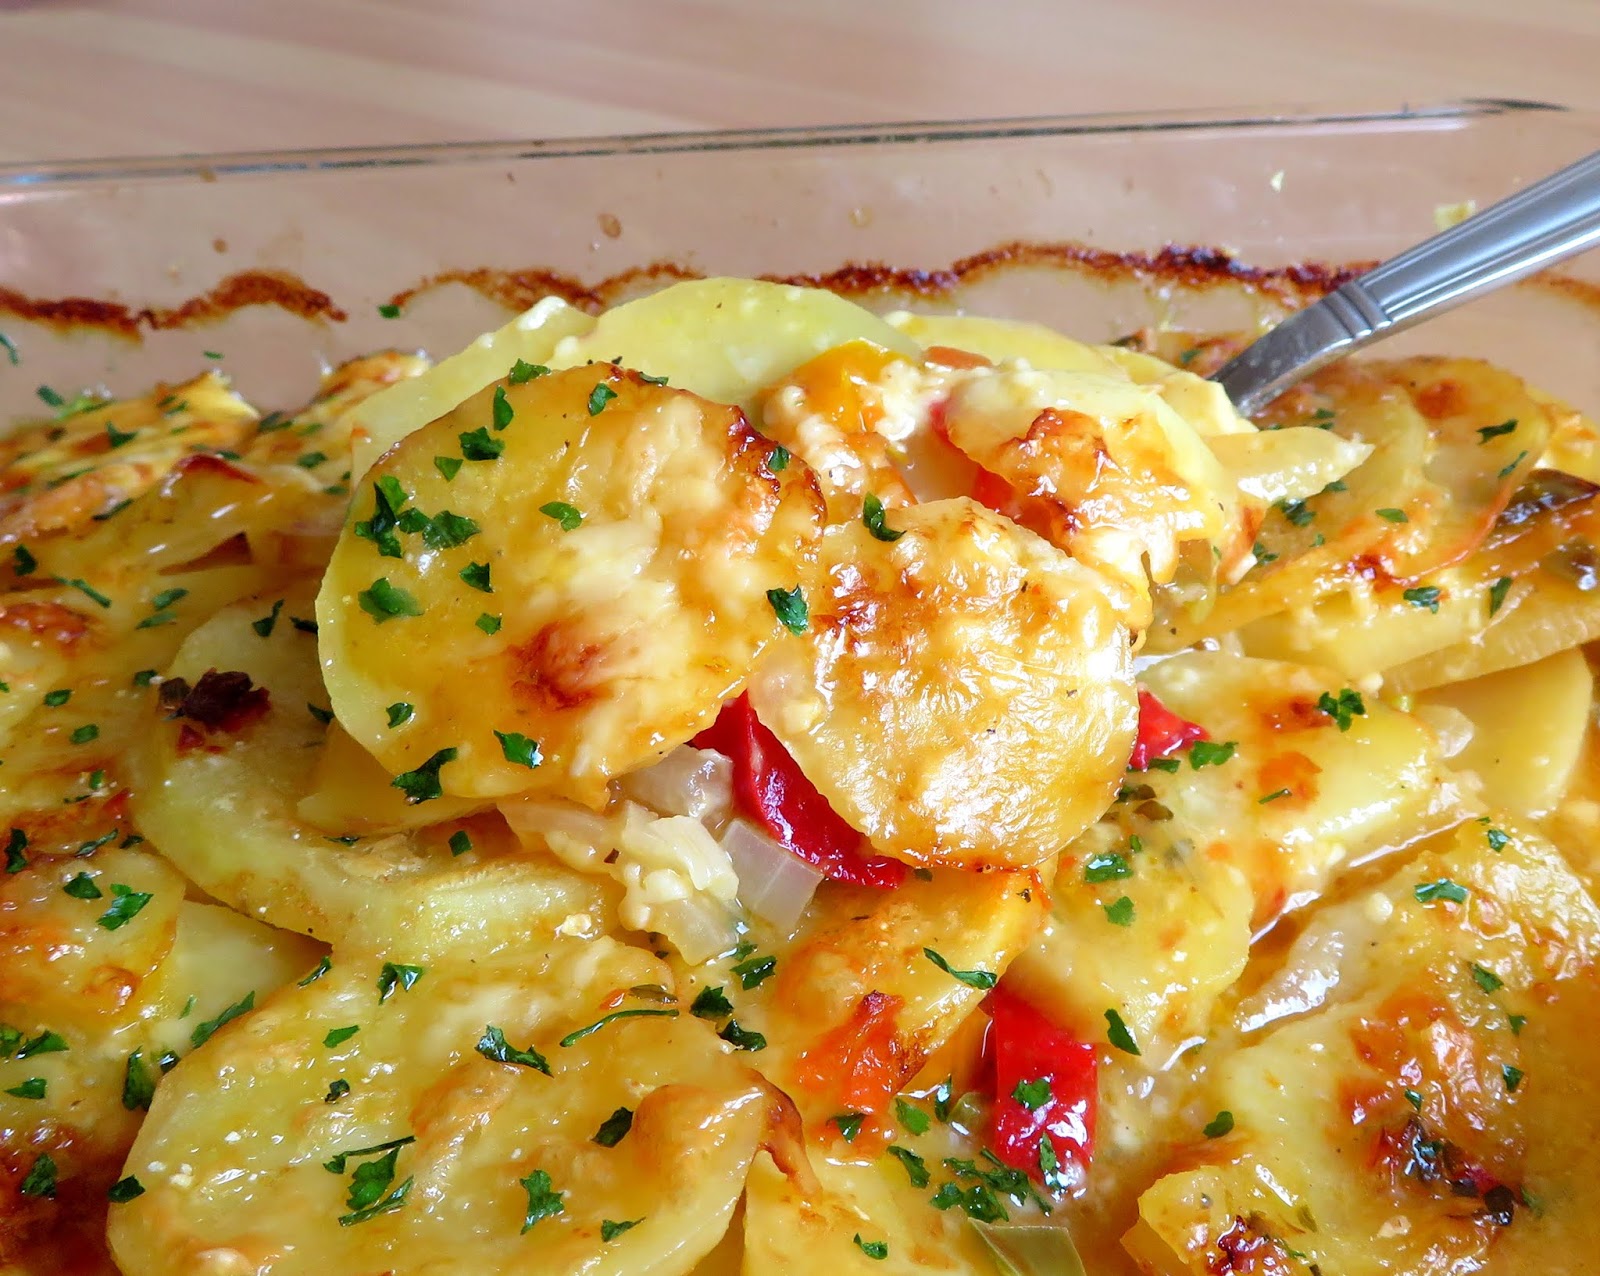
Altogether I was very pleased with the way this turned out.  It was deliciously, cheesy, almost creamy with tender pieces of potato and a nice bit of a bite from the use of the jalapeno pepper.  I call this a win!

Jalapeno & Cheese Potato Bake

Jalapeno & Cheese Potato Bake

Yield: 3
Author:
No doubt about it, this delicious potato casserole is destined to become a favourite.

ingredients:

  • 1/2TBS butter
  • 1/2 pound thinly sliced bell peppers (green, yellow, red)
  • 1 small jalapeno pepper, trimmed, deseeded and finely chopped
  • 1 small onion, peeled and chopped
  • 2 cloves garlic, peeled and crushed
  • 3 medium red potatoes, peeled and thinly sliced
  • 1/4 tsp each salt and black pepper
  • 120g grated strong cheddar cheese
  • 120ml hot vegetable broth/stock (1/2 cup)
  • chopped parsley or coriander to sprinkle (optional)

instructions:

How to cook Jalapeno & Cheese Potato Bake

  1. Preheat the oven to 200*C/400*F/gas mark 6. Lightly grease a shallow 5 by 8 inch baking dish. Set aside.
  2. Melt the butter in a large skillet. Add the peppers, jalapeno pepper and onion. Cook for five minutes, stirring frequently. Add the garlic and cook for five minutes longer.
  3. Season the potato slices with the salt and pepper and then start layering them in the baking dish as follows: 1/3 of the potatoes, 1/2 of the bell pepper mixture, 1/3 of the cheese. Top with another third of the seasoning potatoes, the remaining pepper mixture and 1/3 of the cheese. Top with the last of the potatoes and the cheese. Pour the vegetable stock into the dish.
  4. Cover tightly with foil and then bake in the preheated oven for 50 minutes. Uncover and bake for an additional 20 minutes, until the potatoes are tender and the casserole is golden brown. Sprinkle with the parsley or coriander and serve.

Did you make this recipe?
Tag @marierayner5530 on instagram and hashtag it #EnglishKitchen
Created using The Recipes Generator


This is a great potato side dish that would go with most things.  Meatloaf, chicken, fish, pork.  I can't think of anything that wouldn't go with it actually!  I think Meatloaf would go the best though!  Just saying!